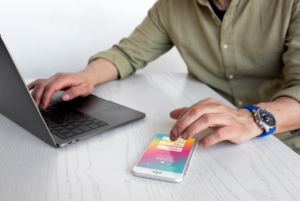


Rumble has become a popular destination for creators seeking an alternative video platform with a strong emphasis on creator-friendly policies. One of its most powerful features is the ability to broadcast live, allowing for direct and immediate engagement with your audience. The process of going live on Rumble involves using an external broadcasting application to send your content to the platform via a protocol called RTMP. While this might sound technical, it’s a straightforward process that gives you full control over your stream’s production. This guide will take you from the initial setup on the Rumble website to configuring your software and starting your broadcast visit rumble.com/pair.
Key Terminology and Concepts
Before we begin, let’s clarify a few key terms you’ll encounter:
- Streaming Encoder: This is the software that captures your camera, microphone, and screen, and “encodes” it into a format suitable for streaming. OBS Studio, StreamYard, and Restream are all examples of encoders.
- RTMP (Real-Time Messaging Protocol): This is the technology that transports your video from your encoder to Rumble’s servers.
- RTMP URL (Server URL): The specific address of the Rumble server assigned to your stream.
- Stream Key: A unique, private password that identifies your stream. It ensures that the video feed coming from your encoder is directed to your specific Rumble channel.
Pre-Flight Checklist: What You Need to Stream on Rumble
To start your journey into live streaming on Rumble, you’ll need to have a few things in order first.
- A Rumble Account with Streaming Privileges: Live streaming is not enabled default. You must have either a paid Rumble subscription, at least 5 followers, or have verified your account with a phone number to unlock this feature.
- Broadcasting Software: You must use a third-party encoder. For this guide, we will use OBS Studio, which is free and incredibly versatile.
- A Good Internet Connection: Live streaming is very demanding on your internet’s upload For a high-quality 1080p stream, an upload speed of at least 10 Mbps is recommended. You can test your speed using various online tools.
- Your Content: Prepare what you want to stream, whether it’s a gameplay session, a talk show, a live tutorial, or any other type of content.
Read More – Activating Kayo Sports on Specific Devices Via kayosports.com.au/connect.
Part 1: Setting Up Your Live Event on the Rumble Website
Your first stop is the Rumble website, where you will create the event and get the credentials needed for your software.
Step 1: Begin the Live Stream Creation Process
Log in to your Rumble account. Click the green camera icon in the top-right corner and select “Go Live”.
Step 2: Input Your Stream’s Metadata
On the next page, click “Create New Live Stream.” This is where you will provide all the public-facing information for your stream. Be thorough here, as this information is key to attracting viewers.
- Title and Description: Make them descriptive and engaging.
- Thumbnail: A custom thumbnail is crucial for getting clicks.
- Category: Helps Rumble recommend your stream to the right audience.
- Placeholder Video: You must upload a short video that will be shown before you go live. This can be a simple “Starting Soon” screen.
Step 3: Obtain Your RTMP Credentials
After you’ve filled in the details and the placeholder video is ready, the “Get Streamer Configuration” button will become available. Clicking this will reveal your Server URL and your Stream Key. These are the keys to your stream. Do not close this page.
Part 2: Configuring OBS Studio for Rumble
Now it’s time to connect your broadcasting software to your Rumble channel.
Step 1: Open OBS and Navigate to Stream Settings
Launch OBS Studio. Go to File -> Settings and then click on the “Stream” tab.
Step 2: Input Your Rumble Credentials
- In the “Service” dropdown, choose “Custom…”.
- Copy the Server URL from your Rumble page and paste it into the “Server” field in OBS.
- Copy the Stream Key from your Rumble page and paste it into the “Stream Key” field in OBS.
Read More – How to Activate Paramount on Your Roku Via paramountplus.com/roku.
Step 3: Optimize Your Output Settings for Rumble
In the OBS Settings menu, go to the “Output” tab. To ensure a stable stream, use the following settings:
- Output Mode: Set to “Advanced” for more options.
- Encoder: If you have a modern NVIDIA or AMD graphics card, choose the hardware encoder (NVENC or AMF) for better performance. Otherwise, use x264.
- Rate Control: Set this to CBR (Constant Bitrate).
- Bitrate: This depends on your upload speed and desired quality. A good starting point for 1080p 60fps is 6,000 Kbps. For 720p, try 3,500 Kbps. Rumble’s maximum recommended bitrate is 8,000 Kbps.
- Keyframe Interval: Set this to 2.
- Audio Settings: In the “Audio” tab, set the Sample Rate to 44.1 kHz and the Channels to Stereo. The audio bitrate in the “Output” tab should be 128 Kbps.
After configuring these settings, click “Apply” and “OK”.
You May Also Like – Activate Peacock TV on Samsung Devices Via peacocktv.com/samsung-setup.
Part 3: Going Live and Monitoring Your Broadcast
The setup is complete, and you are now ready to start broadcasting.
- Prepare Your Scene: In the main OBS window, add your sources (webcam, microphone, screen capture, etc.) to create the layout for your stream.
- Start the Stream from OBS: When you are ready, click the “Start Streaming” button in OBS. You are now sending your video feed to Rumble.
- Verify on Rumble: Switch back to your Rumble live stream page. After a few moments, your stream will appear in the preview window.
- Share Your Stream: Copy the “View Live Stream” link from your Rumble page and share it with your audience on social media or other platforms.
- Engage: Keep an eye on the live chat on your Rumble page to interact with your viewers in real time.